
A few recent 1-2-1 training sessions have focussed on optimising EOS 7D Mark II AF settings for specific subjects. The EOS 7D Mark II is a great camera, and when you optimise the AF you can really benefit from the available focus performance.
To test out the EOS 7D Mark II AF settings for pictures of fast moving dogs. I worked with dog photographer Chrissi Ratcliffe and Rocky, a Jack Russell Bichon Frise cross.
Rocky is one of the more difficult dogs for a camera to focus on, as his coat is matte black/grey and has very little contrast. Fortunately for the test, Rocky is like the Energizer bunny loaded up on perpetually fresh batteries, throw a ball and he chases it every time, and will mostly bring it back too 
It was an overcast day with flat light making it even harder for the camera focus system to find contrast on Rocky’s coat.
There are a range of factors and possible different approaches to this kind of photography. you’ll want to freeze the dog in motion yet be flexible with exposure. Then there’s the AF settings…
Whenever you are heavily tailoring the camera to a specific task, it’s often worth using custom shooting modes. All the customisation only applies in the specific custom shooting mode.
Right down the end of this long post you’ll find tips about focus balls, what EOS iTR does and a tip to make it faster to switch AF area and AF points.
EOS 7D Mark II

Chrissi was using the EOS 7D Mark II with EF 70-200mm f/2.8L IS II USM lens so that’s what I used as well.
The EOS 7D Mark II being a lot lighter than an EOS-1D X is ideally suited to being carried on location by all photographers. It has one of the most advanced AF systems found in Canon cameras outside of the EOS-1D line.
Exposure settings
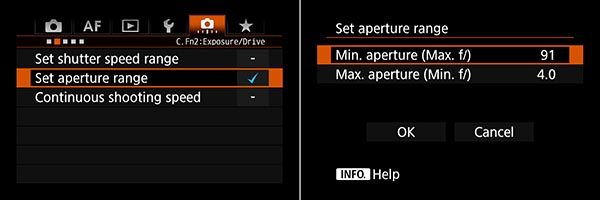
I set the camera to shutter priority to put me in control of shutter speed. I wanted to makes sure that motion blur was not going to affect the sharpness. Initially I used 1/640s but later increased to 1/1250s and 1/2000s. After an initial few throws of the ball, I saw that the depth of field at f/2.8 was too little, so set the camera to limit the maximum aperture to f/4 in the custom functions.

I also tried two methods to control the ISO, auto ISO with a range of 100-6400 or safety shift with ISO. Reviewing the shoot I can see that ISO varied from ISO 100 to ISO 3200 with the majority of pictures in the ISO 100 – 640 range. The higher ISOs were for the static shots when Rocky took a break in the shade.
I set my Picture Style to Standard and increase the sharpening to 4 for sharper shots on the LCD. As I shoot RAW the final sharpening is my decision later at the processing stage.

Even at f/4 depth of field is limited, especially when the dog is so close. Lens at 105mm, f/4 this is not cropped. A good reason to choose f/5.6 as a maximum aperture.
AF settings
Since i’m photographing a moving subject I set the camera to AI Servo AF. It’s worth noting that nearly all the AF tuning parameters only apply to AI Servo AF operation. I used my normal back button AF configuration.
AF settings will depend on the individual photographer, and are influenced by the photographer’s own ability to keep the AF point on the subject. Due to Rocky’s almost matte black coat I knew that keeping him sharp and keeping a single AF point on him would be a challenge for me.
I opted to start with a group of five AF points in a cross shaped arrangement; Expand AF area. Doing so does mean the camera EOS iTR – intelligent tracking – is not active, it only works for zone AF area modes. Later I moved to the Expand AF area: Surround (block of 9-points) and Manual select Zone AF (12 or 15-points) where EOS iTR would be active.
AF Case
AF cases are a grouping of three AF parameters;
- Tracking sensitivity
- Acceleration / deceleration tracking
- AF point auto switching
You can individually set each of the three parameters, to refine your camera to your way of working and the subjects you choose. You are not limited to just six possibilities.

I started out with AF Case 3, this increases the tracking sensitivity making the AF more likely to jump to a new subject closer to the camera. Dogs running through long grass may be problematic with this, but on an open field should be less trouble. Acceleration / deceleration tracking also increases with Case 3, Rocky can be charging towards the camera nice and consistently then stop to sniff something in an instant, or change direction from going towards the camera to going across the camera. I found I had better results using Zone AF than AF point expansion: surround. EOS iTR was probably helping me out somewhat
However there wasn’t a lot of consistency, the AF was readily jumping to blades of grass as it struggled with the low contrast fur. You might find it works ok for dogs with glossy coats or more obvious patterns.

However when I switched to AF Case 5 I found my results were far more consistent. I got more pictures in focus with Rocky running towards the camera and running across the frame.
Case 5 differs from Case 3 in all three parameters. Tracking sensitivity is reduced, the camera stays with the subject a bit longer rather than be jumping off to new subjects as much. Also with Rocky mostly running in a predictable direction the Acceleration / deceleration tracking was more suited predictable speed rather than rapid stop and start.
Charging round the garden chasing kids you might need to increase it to 1 or switch to Case 6, which is the same. I found that with more freedom for the camera to change AF point, Zone AF really worked well for me. Even though Rocky is a low contrast black dog against green it is a shape EOS iTR can deal with to see where to move AF points.

AF case 5, Zone AF
If you really are able to keep the AF point on your subject, then using a smaller group of points will ensure your camera doesn’t focus on unwanted subjects. A change of AF case to Case 1 instead of Case 5 would reduce the AF point switching. Though you can tweak the parameters of each AF case too.
When all else fails – focus balls!

Focus balls – may be your best friend for dogs like Rocky
After the session with Rocky we took time for a cup of tea and a look at the shots, one thing came up in conversation – focus balls. Seriously if you get the dog with the ball in his mouth, and the ball is brightly coloured, there’s a good contrast between the dark coat and the ball. So you heard it here first – focus balls, I better get selling them!
What does EOS iTR do?

Photo is 480 x 320 pixels (150K pixels), about the same resolution as the EOS 7D Mark II exposure metering / EOS iTR sensor
EOS iTR uses the camera exposure metering sensor to create a low-resolution picture of the scene, and then link with the AF system to change AF point based on the position of colour, shape and faces. The EOS 7D Mark II has a 150K pixel metering sensor so the low resolution image is close to 480 pixels wide by 320 pixels tall; enough to see shapes, colours and faces.
What I have found is that using the smallest zone AF area can help many photographers who struggle to keep the AF point on a dynamically moving subject. You may need to increase the AF auto point switching parameter of the AF case to make it faster to switch AF points.
EOS iTR is currently available on the EOS-1D X, EOS-1D X Mark II, EOS 7D Mark II and EOS 5DS / 5DS R.
Change AF point faster

I find that limiting the available AF areas to only the ones I use makes it faster for me to use the camera. I configured the camera to only have four out of the possible seven AF point selections.

I use the custom controls to make the multi-controller move the AF point just by nudging it with my thumb – Direct AF point selection. Also the AF area select lever is set to change the AF area just by moving it with my thumb – Direct AF area selection. These two settings in combination make it simple to change AF area and position of the AF point across the 65 points whilst looking through the viewfinder.
The post Best EOS 7D Mark II AF settings for dog photos appeared first on Photography and training by Brian Worley - p4pictures


